Tuesday, January 1, 2013

Baked Rigatoni Pasta

This is a very fast, easy, and especially delicious pasta recipe. We got all the ingredients from Trader Joe's.

The ingredients are meant to all cook in one pan to save clean-up, then there is one baking dish, and that is it. I suppose this could all be done in one large pan like a paella pan, I will try that sometime!

Ingredients:
- Olive oil
- Butter, about 2 tablespoons
- Sliced mushrooms, one bag
- Rigatoni
- Cherry tomatoes, one small basket
- Sausage, about 1lb., (sausage links are fine, cut them open and remove the sausage)
- hard cheese, like reggiano parmasagna, about 1 cup grated fine.
- Marinara sauce (Trader Joe's sauce from a jar is really good and easy for this recipe, or you could make your own of course)
- Garlic
- Herbs (whatever you like, fresh basil is nice), dried herbs are fine (e.g., herb de provance)
- Bread crumbs for topping, 1/4 cup (optional)
- White cooking wine, about 1/4 cup
Chese, tomatoes, and sauce

Procedure:
- Preheat oven to 350 degrees.
- Boil rigatoni until al dente, make sure it is not overdone, it will cook more when baked later.

This is the part that gets done in one pan:
- Saute garlic in olive oil until light brown and fragrant.
Sautee the mushrooms and sausage
- Add mushrooms and saute with garlic until the mushrooms have a nice light brown color, then add sausage and break up sausage. Cook sausage until done, but not overdone, it should be soft - it will cook more later during baking.
- In the last 5 minutes, add in cherry tomatoes, sliced in half, and cooking wine, and to cook just a few minutes until the tomatoes soften and the wine evaporates.

Combine everything in the baking dish:
- Hopefully the rigatoni is done boiling while you are cooking the sausage - drain the rigatoni and put in a baking dish with the butter, and mix until the butter is melted and the pasta coated.
- Add about 1 cup of Marinara sauce and mix.
- Add in the sausage, mushroom, and tomato mixture and mix well.
- Add in the cheese and mix again.
- This is an optional topping: Mix breadcrumbs with a couple tablespoons of olive oil and herbs - it will be like a paste. Spread it on top and mix a little with the top layer.
Adding cherry tomatoes
- Place the whole thing in the over for about 30 minutes. It will look brown and bubbly when done.
Mix the sausage with the cooked pasta

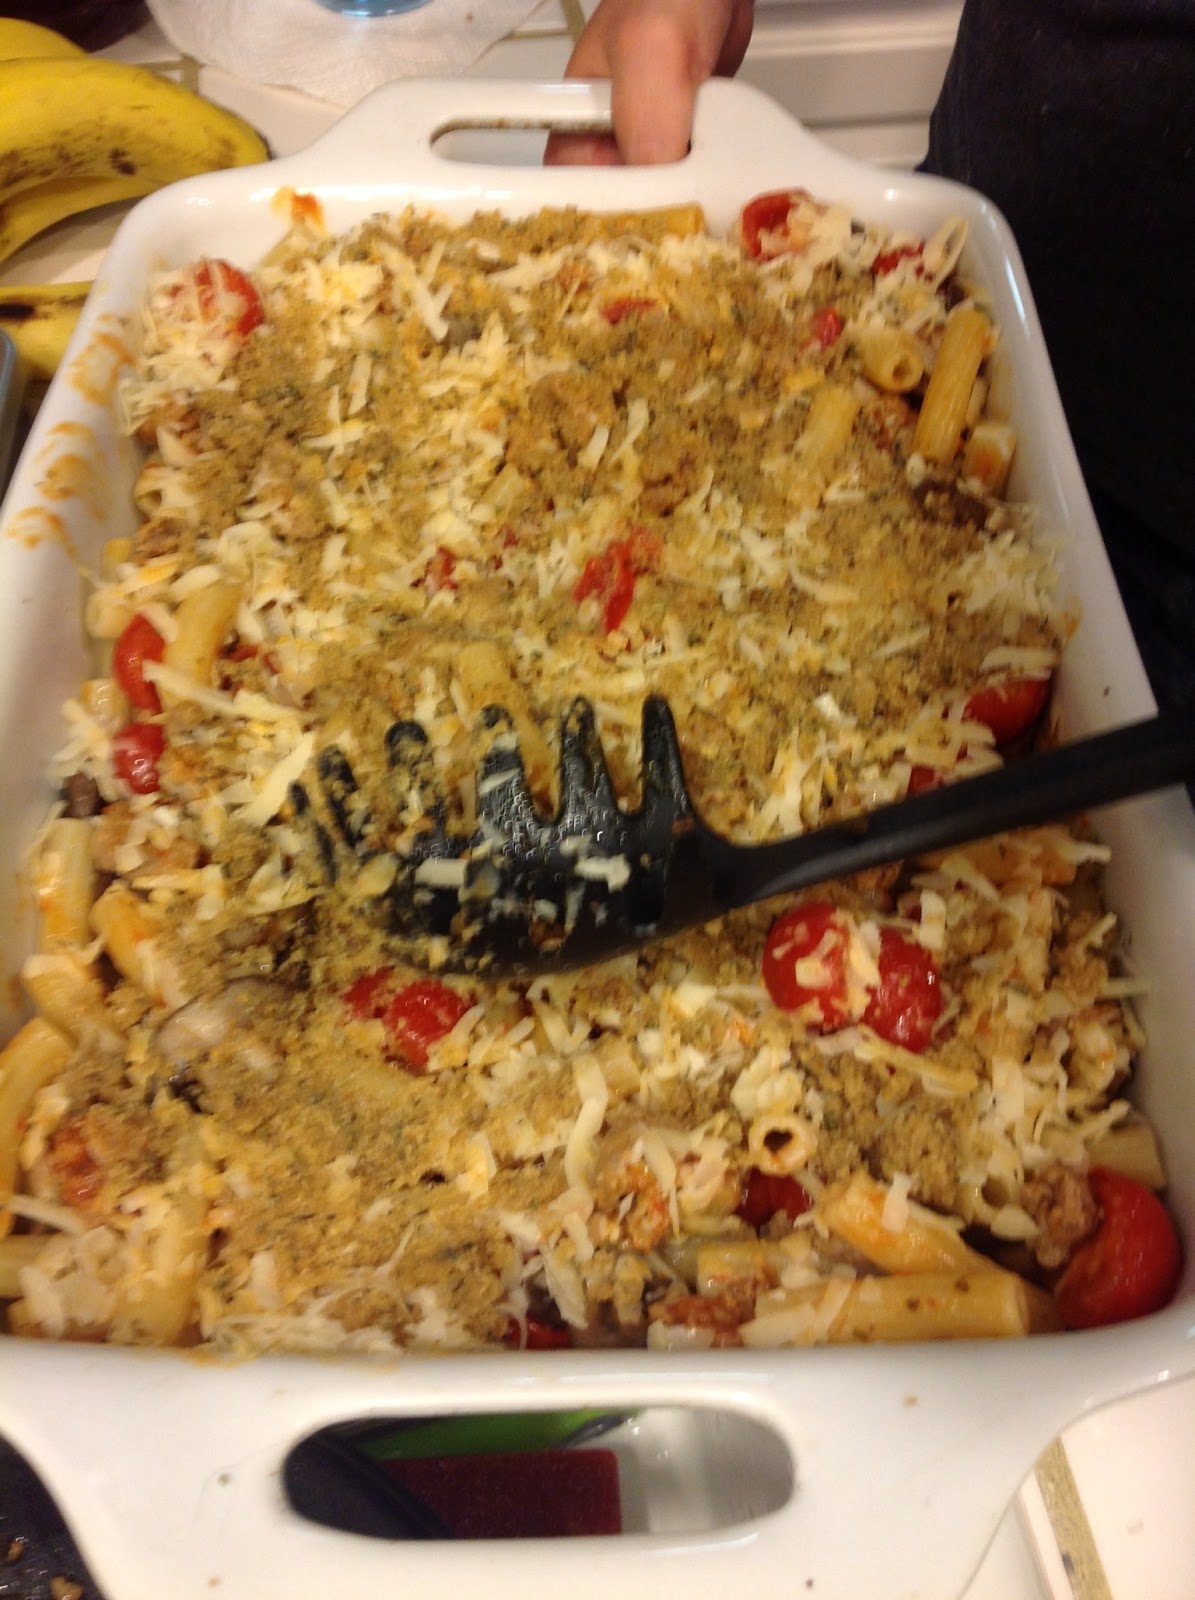
Ready to go in the oven

Friday, May 11, 2012

Simple Peach Galette

The finished galette
This great looking, and tasting, dessert is also amazingly simple to make. Just a few ingredients, and most of them are pre-made, so it is very simple.

This type of pastry is called a Galette in France. The name is given in general to flat, round, crusty cakes. Well, mine isn't round, but... it's still a galette.

The thing that makes this simple is that the pastry is pre-made, and the peaches come from a can or jar. Just a few other ingredients, and it is done. You can usually find the pastry crust frozen; they can be round, square, and various types. The one I used here is a "puff pastry" meaning it is several layers, and it gets very nice, crusty and crispy when it bakes. A regular pie crust of course would be fine.. and I read a recipe once by the wonderful chef Jacques Pepin, where he actually used a flour tortilla for the crust! How cool is that?


Ingredients:
- Jar of peaches in syrup; save 1/4 cup of the syrup
- Puff pastry - pre-made; usually these are found in a frozen food section
- A few tablespoons of preserves - I used apricot in this recipe
- A few tablespoons of butter
- 1 tablespoon of brown sugar
- 1 oz shot of Cachaca; whiskey or cognac is a great substitute
- parchment paper for baking

The ingredients
Procedure:
- Melt butter, stir in brown sugar, 1/4 syrup from the peaches, and cachaca - simmer this slowly to reduce by about 1/3 or 1/2... watching it to make sure it does not thicken too much or burn; you want the consistancy to be a bit thick so it coats the peaches nicely.
- Lay out the pastry on the parchment paper, and smear on apricot preserves. Fold the edges of the pastry to form a barrier so the juices don't run over the edge. See the picture.
- Arrange the peaches. Also see the picture of the arranged peaches.
- Pour the reduce syrup over the peaches, and sprinkle with a little more brown sugar.
- Bake at 350F for 20-30 minutes; watching it carefully to see it brown nicely. I like to bake on top of parchment paper; this will guarantee that it wont stick on the baking pan and get ruined.
- You can sprinkle some cinnamon on top if desired.


The preserves on the pastry
Arranging the peaches

Impromptu Avocado-Tomatoe Salad

This idea came up from some left over veggies sitting around... It is easy & delicious. We were having steaks, and wanted a cool, refreshing salad to go with.

Ingredients:
- Avocado
- Corn
- Cucumber
- Tomato
- Balsamic Vinegar

Procedure:
- All the veggies should be cut into small pieces to get an attractive mix of ingredients.
- So, dice a couple tomatoes, a cucumber, and an avocado
- For the corn, we had a left over corn-on-the-cob from the day before. I sliced this off the cob, and sauteed over high heat in a little oil. Any kind of oil is fine. Just brown the corn, and let it cool a bit before mixing so it doesn't cook the other veggies.
- Mix everything in a bowl, season however you like (a little salt and pepper for us), and drizzle with a good Balsamic vinegar.

That's all there is to it.

Monday, April 30, 2012

Baked Tomato Pasta

I created this very simple recipe when I moved to California in 1990. As my daughters have grown up, this has always been their favorite family dish. We still make it all the time. The recipe hasn't changed much in the last 22 years.

The secret ingredient is the kind of tomatoes. They need to be a kind of tomato that bakes and caramelizes properly. Roma tomatoes work the best. Sometimes these are also called Italian plum tomatoes. I have tried others, and they require different baking times and temperatures, and sometimes aren't as sweet - so try to find Roma tomatoes.

When the tomatoes are baking, they will taste best if they are cooked just to the point of caramelizing -  they almost look like they are going to burn - then they are perfect. They will taste very sweet.

Ingredients:
- Roma tomatoes, about a dozen
- Parsley
- Garlic
- Olive Oil
- Butter
- Parmigiana cheese
- Fine, long pasta - angel hair or thin linguini


Procedure:
- Slice the tomatoes lengthwise (see picture - Anna is doing a good job on the tomatoes) and place cut side up in a baking dish
- Finely chop about 1/2 cup of parsley, chop several cloves garlic, if you like garlic, 5-6 cloves is pretty good. We usually chop a little extra garlic and save it for garlic bread.
- Season the tomatoes with salt and pepper
- Mix the parsley, a few tablespoons of oil, and garlic together. Spoon about 1/2 of the parsley-garlic-oil mixture over the cut tops of the tomatoes.
- Drizzle the tomatoes and parsley with a little extra olive oil, a few more tablespoons. 
- Bake the tomatoes with the parsley mixture in the oven at 425 degrees F about 60 minutes. Towards the end of the time, watch the tomatoes, they should be very dark, soft and caramelized. Careful, they can burn, you want to bake them right up to the point before they burn.
My Recipe Notebook from 1990!
- While the tomatoes are baking, boil the pasta - it helps to get the past done around the same time as the tomatoes so the pasta is still warm.
- Remove the tomatoes from the oven, toss in a few tablespoons of butter. Mash a couple of the tomatoes, leave a few whole, however you want it is fine.
- Toss the pasta into the tomato dish and mix thoroughly
- Toss over the remaining parsley-garlic mixture, and sprinkle on Parmigiana cheese.
- It's ready to serve!!

Saturday, October 1, 2011

Beringela Parmagiana - Eggplant Parmigiana


Beringela is the Portuguese for aubergine. What is aubergine? Well, here in the US it is called eggplant, because in the 18th century some cultivated varieties resembled yellow goose eggs.

The keys to really good eggplant parmigiana are 1) getting the eggplant nice and tender
and then, 2) a tasty sauce.

For the eggplant, bake it first alone on a cookie sheet with a little olive oil until the flesh is pretty soft and browned. There are two tricks here, first, the baking softens and browns the eggplant, and second is that a little olive oil flavors the eqqplant. You've probably noticed before that you can soak eggplant in olive oil and it soaks up a huge amount. So, use that to control the amount of olive oil, and just put in enough to give it a nice flavor but not too much so the dish is too rich. You can do this entirely to your taste.

The sauce used can be the same as my favorite Home Made Pasta Sauce recipe, and you can leave the tomatoes a little chunkier if you want a little more texture. Make a lot of sauce, and then whatever is not used for the eggplant can be saved and used later for a pasta dinner.

Ingredients:
- Eggplants, about 2 medium ones will do
- Use the sauce recipe mentioned above... if you are in a hurry a good jar of sauce will work of course
- hard parmigiana cheese
- breadcrumbs
- oregano (fresh is best)
- Olive oil

Procedure for the eggplant:
- Slice the eggplant into 1cm thick round slices, then slice the rounds in half
- spread out a few tablespoons of olive oil on a cookie sheet and rub both sides of the eggplant in the oil, getting a little on each side. They don't have to be soaked, just covered a bit. Adjust the olive oil to taste - the eggplant will soak this up and you'll be eating it, if you like a lot of olive oil, then use a lot... careful it can get too rich though.
- Bake the eggplant at 375 for about 20-30 minutes until it is dark brown and soft. You can flip it if desired midway.

Assembling & Baking the Eggplant Parmigiana:
- Put a thin layer of sauce in the bottom of a baking dish
- Put a layer of eggplant
- Put a layer of grated parmigiana cheese
- Repeat for at least 3 layers, finish the top with a little sauce and parmigiana cheese
- Toss breadcrumbs in olive oil and some chopped fresh oregano, then spread this on top. If you don't have fresh oregano, use dried oregano sparingly, it can be strong... if you have fresh, use can use alot
- Bake at 375 for 30 minutes, it will be bubbly and brown on top

Variation with mushrooms:

I also like to add cogumelo, which is portuguese for mushroom. The mushrooms I like are Shiitake, because they have a nutty flavor and are very meaty. Any mushrooms would be nice though.

The way to add these is to slice the mushrooms thin and saute them separately until they are cooked pretty well, then layer them along with the sauce and cheese. Very simple addition to this dish that can add another very nice flavor and texture.

Sunday, May 8, 2011

Limoncello Batch #17


Limoncello is a variation of Lemoncello with limes instead of lemons. I've tried it a few times and it's a bit more difficult to make because the limes have a more pronounced 'bitterness' and need some work getting the amount of syrup right. If you have a favorite 'family' lemoncello recipe, it probably won't come out perfect first try w/limes. We found the secret in making good limoncello was in making a very concentrated syrup.

Ingredients:
- A dozen limes
- 750ml Everclear
- White sugar
- Distilled water

Procedure:
- Grate the green part of the peel off the limes, careful not to get any white. Use a cheese grater.
- Put the grated lime peels in a jar with the Everclear. This process is called 'macerating' by the way. The limes need to sit in here for a while, let them soak for about a month, gently stirring the jar every few days. Keep it in a cool dark place. The color of the liquid is amazingly beautiful!
- When ready, pour the liquid off through a strainer. You can use coffee filters for this. Usually I strain it through the filters a couple times.
- Boil the sugar in the water. OK, here is the secret amount: 2 cups sugar to 2 cups water. Boil a few minutes and let cool. It will be nice and thick and syrup-y. Let is cool to room temp before using.
- Pour most of the syrup into the lime extract, saving about 1/2 cup. Give it a taste, if it is still bitter, add a little more syrup. The syrup is very concentrated, so you can control the sweetness of your limoncello quite a bit by small amounts of syrup. Just get it how you like it. I suppose you could even make more syrup if you want it sweeter.
- Put this in the freezer, within a day or so it gets nice and thick and ready to drink.
- There is one more step if you are a perfectionist. After a week or so in the freezer, the limoncello will develop some black specs. Traditional Lemoncello (with lemons instead of limes) doesn't do this, and Im not sure why, but of course the only thing it can be is the difference between lemons and limes. So, if you want it to be nice and clear, you can filter it one more time through a coffee filter, and put it back in the freezer.

Some notes:
As you can tell from the name "Batch 17", it took a while to get this recipe right. I learned a lot of tricks. For example, many recipes call for Vodka instead of the more expensive and harder to find Everclear - really the Everclear is much better. Also, the sugar water ratio is very important - I learned that making a very concentrated syrup, with equal amounts of water and sugar, made the lime flavors stand out more because you need much less syrup to get to the proper sweetness.

Thursday, May 5, 2011

Gnocchi


Ingredients:
- 3 pounds russet potatoes
- 2 cups flour
- 1 egg

Procedure:
- The most important thing is to get organized, because when the potatoes are done and it's time to mix and cook them, it gets hectic
- Don't peel the potatoes; boil them until done. If they are big, expect 45+ minutes. Test them with a fork, they need to be pretty tender.
- Take the potatoes out of the water and let them cool until they are just cool enough to work with your hands.
- Peel the potatoes, and on a big workspace, mash them with your hands. Mix in 2 cups of flour gently, form a well in the middle and crack the egg in the well.
- Mix the whole thing with your hands. It will be sticky, when well mixed and the stickiness goes away, they are mostly ready.
- The mixture needs to be kneaded, but not too much. 2 or 3 minutes is ok.
- This is where you need to be extra organized; boil a big pot of water, and fill another big pot with an ice bath.
- Put one batch at a time into the boiling water and boil until they float. This only takes a minute or two. One batch is maybe a dozen gnocchi.
- Take the done, floating gnocchi out and put into the ice bath.
- Repeat until all are done.

The gnocchi are now ready to reheat and eat. A nice way to reheat them is in a pan w/olive oil or butter.